


Introduction
A couple of years ago, I built and published my first app built with Flutter, Timelog. It's a time tracking app which lets you track your time across different activities, and set daily/weekly/monthly goals per activity. I built this app mainly for myself, but I was quite happy to find out that a lot of other people have found it useful too.
Fast forward to the start of this year, and I was looking forward to building another app with Flutter. I decided to build Flow, a simple expense tracking app that would fit my needs, as I found the tons of expense tracking apps already out would either have clunky UIs or way too many features that I didn't need, yet still not flexible enough.
Firstly, I'd like to point out that no, this is not a guide to build and publish an app in production in a weekend. The title may be a little misleading (sorry!), but by 48 hours I mean 48 total hours of development of the app as well as the landing page, in addition to the Play Store listing (I haven't got to publishing this to the App Store yet). This process actually took me about 3 months in total, and I was mostly building this during the weekends and evenings in 1-3 hour chunks.
I actually used my first Flutter app, Timelog, to track how much time I spent building Flow, and that's how I noticed that by the time I had published Flow to the Play Store, I was at roughly 48 hours tracked in total. I also ended up looking at Timelog's source code to see how I did some things, and even copied some approaches and technologies used.
In this post, I will go over the process I took to build Flow, an expense tracking app with Flutter, in 48 hours of total development. We will start from the (a bit too short) planning phase, followed by the implementation, and then the final steps leading to publishing the app on the Play Store.
Planning
This phase was relatively short, and mostly consisted of thinking about what features I would want such an app to have, at least for a minimum viable product.
Features
Expense tracking
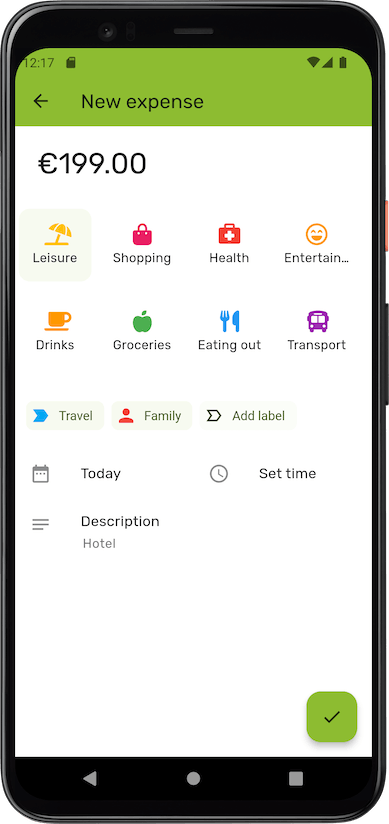
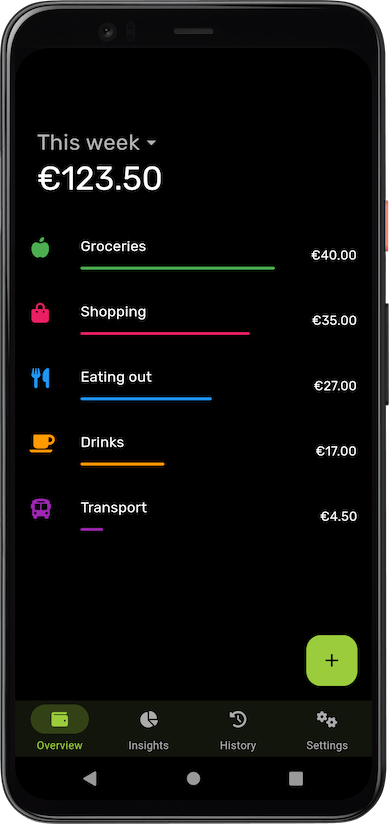
This was an expense tracking app, so of course it would need to support recording your expenses: an amount, a date, and a category. Users should be able to see a history of their expenses, as well as manage their categories.

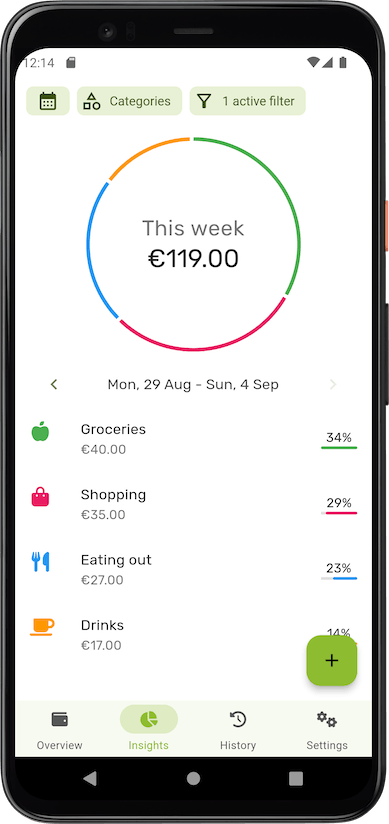
Statistics
Of course, the reason you would track your expenses is to monitor your spending and see how much you spend and on what. One of the main features would be to display useful charts that would show you total amount spent per category, with options to filter categories and set specific time ranges.
For this, I used syncfusion_flutter_charts. It's very customizable and has every chart I could think of, or at least needed. I had also used the same library previously for Timelog, so this was an easy choice.
Labels
For Timelog, my first app, the stand-out feature which most of the existing time trackers did not have were goals you can set per activity. For example, I have a reading goal of 2 hours per week, and a blogging goal of 4 hours per month (though thanks to #4articles4weeks, I'm already well past over 4 this month!).
For Flow, the stand-out feature is the ability to assign labels on each expense. For example, you could have labels specific to locations, trips, or people. This way, you could track exactly how much you spend e.g. on a trip, without having to assign the generic "Travel" category to every expense.
Currencies
Users in different countries will need to track expenses for different currencies. The user should be able to pick their own currency, and this package made this very easy to implement. Supporting multiple currencies at the same time would make things more complicated, so this was left out and added to the backlog as a feature for the future.
Design
I'm not a designer, but thankfully, it's easy to build beautiful looking UIs with Flutter. I decided to simply use the Material widgets to make my life easier, as the Material look is decent enough for all platforms.
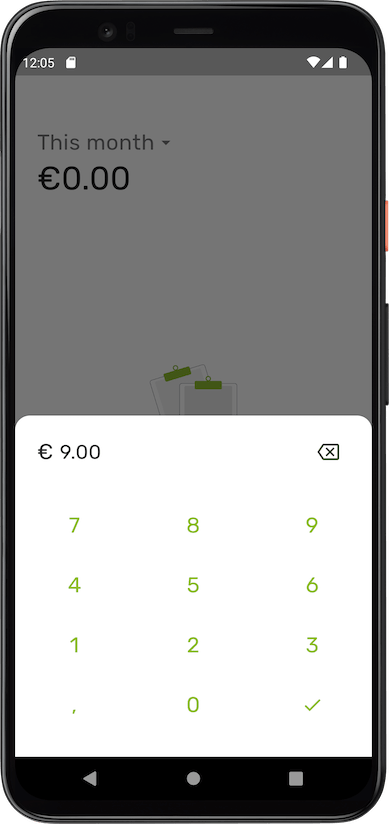
The main layout is just a Scaffold with a NavigationBar at the bottom and a FloatingActionButton to record expenses. There's also a lot of ListTile widgets used for the expense history, settings, and the category/label management pages, as well as icons and charts. The most complex widget that I built from scratch was the number picker, which you can input the expense amount with. It's really just a bunch of rows and columns, but the decimal button logic was a bit tricky.
Implementation
Data storage
For an expense tracking app, we need to store the user's expenses and categories. At least for the first version, we're just going to store the data locally on the user's device. For this, I went with Drift, which is built on top of sqflite. For less critical data such as the theme and user preferences, shared_preferences is used instead.
State management
I spent ages trying to figure out which state management approach to use for my first app, so thankfully this time it was easy. For state management, I used "vanilla" Flutter; a combination of FutureBuilders, StreamBuilders, ValueNotifier/ValueListenableBuilders, and even StatefulWidgets.
Drift, the persistence library supports exposing data not just as futures but also as streams, which emit new events every time the data changes. Most views showing data such as expenses, categories or labels simply use a StreamBuilder to display the data, and these are refreshed automatically every time something is added or changed.
Other views that require "complex" state such as the expense creation page, are made of small StatefulWidgets that communicate changes to the data through callback methods, and state changes that influence other widgets can do so through ValueNotifiers.
In total, so far, the app uses 12 StreamBuilders, 8 FutureBuilders, and 9 ValueListenableBuilders. No external libraries!
Architecture
Flow is a simple app so far. A lot of the business/data logic that deals with creating expenses, storing user settings and configuring notifications is isolated in specific Service and Repository classes. These classes are passed around to widgets through the use of a Services inherited widget, which holds the references to instances of any dependencies needed.
class Services extends InheritedWidget {
  final ExpenseRepository expenseRepository;
  final SettingsService settingsService;
  final NotificationService notificationService;
  final AnalyticsService analyticsService;
  final SubscriptionService subscriptionService;

  Services({
    Key? key,
    ...
    required Widget child,
  })  : ...
        super(key: key, child: child);

  static Services of(BuildContext context) {
    final Services? result =
        context.dependOnInheritedWidgetOfExactType<Services>();
    assert(result != null, 'No Services found in context');
    return result!;
  }

  @override
  bool updateShouldNotify(Services oldWidget) {
    return false;
  }
}
To avoid coupling widgets with business logic, some complex bigger widgets/views have their own ViewModel class, usually per page/screen. This view model has all the dependencies needed (services or repositories), and the view simply calls methods on this view model.
class NewExpenseViewModel {
  final ExpenseRepository _expenseRepository;
  final CategoryRepository _categoryRepository;
  final AnalyticsService _analyticsService;

  int amount;
  DateTime date;
  TimeOfDay? time;
  Category category;

  NewExpenseViewModel(
    this._expenseRepository,
    this._categoryRepository,
    this._analyticsService, {
    required this.amount,
    required this.category,
    this.time,
  }) : date = DateTime.now().startOfDay;

  Future<void> save() async {
    _analyticsService.track('new_expense');
    await _expenseRepository.create(
        amount, date, time, description, category.id, labels);
  }

  Future<List<Category>> get categories => _categoryRepository.all;
}
These views and view models are created by first getting the Services from the context in order to create it with any of its dependencies, like below:
Future<Expense?> openNewExpensePage(
    BuildContext context, int amount, Category category) {
  final services = Services.of(context);
  final viewModel = NewExpenseViewModel(
    services.expenseRepository,
    services.categoryRepository,
    services.analyticsService,
    amount: amount,
    category: category,
  );
  return Navigator.push<Expense>(
    context,
    MaterialPageRoute(
        builder: (_) => NewExpenseView(viewModel)),
  );
}
This is a basic architecture that's been working for me. It's quite simple and has no dependencies on external libraries, and view models can easily be tested in isolation. It does feel like a little bit of boilerplate at times, though, especially when trying to build something quickly, and especially in a team of one. I do occasionally "cheat" by accessing the services and their methods directly in widgets, though!
Local notifications
Flow has a simple daily notification to remind you to register your expenses. This is set when you first open the app and can be toggled on/off and its time can be changed. For this, I used the local_notifications package.
Theming
No app is complete without dark mode! In Flutter, it's so simple to implement that it was one of the first things I worked on. I also used flex_color_scheme with the Material 3 settings enabled to make my life a bit easier, and even have true black mode out-of-the-box in addition to dark mode.
Since Flow is meant to be a simple expense tracking app, I also made use of Material 3's dynamic color feature to change the app's theme/color based on the user's main theme/color on their device.
Monitoring
While monitoring of any kind is optional, it's something I'd recommend to always have, just to have an idea of how your app is used, or how it doesn't work!
Analytics
I find it useful to track metrics to measure how and how much the app is used and what features are used the most. Things like expenses created, new labels created, and which statistics/charts are viewed the most. This can help decide which features to focus on while working more on the app.
For Flow, I decided to go with Mixpanel, as it had an official Flutter package. However, I later realized that you can only have up to 5 reports on your dashboards on the free plan, which is far too little to get any useful insights. Because of this, my suggestion would be to go with something like Amplitude instead, which has a much more generous free tier.
Crash reporting
I went with Sentry for error/crash reporting, which also has good support for Flutter. It's nice to be able to see any errors thrown while other users are using your app, as your tests might not catch everything. And in my case, I was only mostly testing things manually (sorry, TDD folks!).
On-boarding
Another "nice-to-have" is an on-boarding flow. This is what is shown when a user first starts up the app. I used the smooth_page_indicator package as well as some images from unDraw to show a few pages explaining Flow's core functionality. On the last page, the user can also opt in or out of the analytics and crash reporting mentioned above.
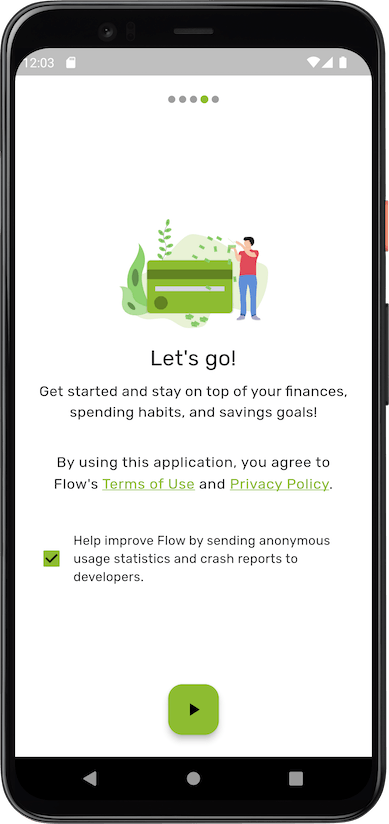
A good follow-up for the introductory pages would be a tutorial, or tour, of the main functionality. For Flow, for example, the FAB that lets you add expenses could be highlighted with a tool-tip explaining that this is where you need to tap to start tracking expenses. Flow is currently not that complicated to require such a tutorial, though.
In-app purchases
I wanted to monetize the app from the beginning. Again an optional step, but it's nice to be able to validate if your app is actually good and unique enough for people to want to pay to use it more. I'm not a fan of ads at all, so I decided to implement a one-time "Flow Plus" purchase, which gives you access to more colors and icons for categories and labels, as well as unlimited labels.
For the implementation of in-app purchases, I used RevenueCat. When I was building Timelog, Flutter's official in_app_purchase plugin was not complete. This is how I found out about RevenueCat and its purchases_flutter package. RevenueCat has lots of extra features and functionality you might otherwise have to implement yourself, in addition to a generous free tier!
Necessary things
In order to publish the app on the stores, there are some small things I had to include, namely, terms of use and privacy policy pages. I had already bought a domain for the app, flowmoneytracker.com, so I created two pages with the necessary information there, making sure to include third party services used for monitoring. I also spent some time on a very basic landing page.
Since I implemented in-app purchases, I also needed to make sure a "Restore purchases" option is available. This is a requirement for iOS apps, and I made sure to add this in the settings page as soon as possible, as it's one of the reasons Timelog's initial App Store submission was rejected!
A few more things
I wasn't really in a rush to release Flow, which is why I spent some time to also implement some features that are not really necessary to have in a minimum viable product. Some of these I also wanted for myself and did not take too much time, so I went for them:
- The option to change the start day of the week (for the weekly statistics)
- A set of preset categories as well as pages to manage categories and labels
- Backup and restore functionality (useful for me in case I broke things while testing on my device! I had already been tracking my expenses while developing the app, and didn't want to lose my data)
- Sharing functionality that simply shares the landing page's URL, and a feedback option that opens up an email to Flow's support email. I used ImprovMX to forward support emails to a personal email account.
Production
Publishing
And so, after a little less than 48 hours divided across 1-3 hour sessions, Flow was ready for production. I spent some time making screenshots for the Play Store listing, and quickly wrote short and long descriptions. A couple of days later, Flow was approved, and live on the Play Store.
Once I gather some more feedback from the Android version and make some more improvements, I also want to publish Flow to the App Store. Maybe even on desktop platforms, but I would need to make some layout changes first so that it looks good on larger screens.
Future plans
There are too many features an expense tracker like Flow could eventually support: recurring expenses, income tracking, budgeting, multiple accounts, multiple currencies... The current plan is to keep things simple and see if the labels feature actually makes Flow stand out from the hundreds of expense tracking apps out there. I do need to first market it a little, as currently it's just quietly sitting in the Play Store and not very easy to find!
Wrapping up
I hope you found this post helpful! It covered a little bit of everything involving building Flutter apps, from designing and planning to implementing, with a little technical details on the architecture as well as packages and approaches used.
I've been using Flow for myself for a few months and find it quite useful, so this is already a win for me! It's been a great experience building and publishing my second Flutter app. Since publishing my first Flutter app two years ago, Flutter's developer experience has improved, making it easier to develop with Flutter, and I even got to re-use some past learning from the first app. Perhaps my third app could be published even quicker!
Cover image generated by OpenAI's DALL-E.
This article was published as the #week3 article for #4articles4weeks.