


Introduction
In the previous part of this tutorial series, we went over what Supabase is, and started building a simple notes app with Supabase. So far, we got authentication working.
In this part, we will go over Supabase's Database offering. We will create a table to hold all the users' notes, and display them in the app, as well as let users create, edit and delete notes.
Code snippets for both widgets and services will be shared along the tutorial, but you can find the full source code here.
Postgres and Supabase
Supabase is built on top of Postgres, a relational database. Some basic knowledge of relational databases and SQL would help, but is not required, as Supabase makes it easy to view the database, its tables, and run queries through its admin interface.
We'll be making use of the SQL editor on Supabase's admin interface to run the SQL queries to create the tables we need.
Supabase also provides a nice "table editor" which lets you create tables without needing to write SQL. However, for the tutorial, it's actually easier to share SQL queries to run directly from the SQL editor. If you'll be working with Supabase, I'd recommend getting familiar with SQL anyway.
With the Supabase client, we can access the database with two ways:
- RESTful API - This uses PostgREST behind the scenes, which is a thin API layer on top of Postgres, which allows you to write your queries straight from the client side of the code (our Flutter app). This is what we'll be using in this tutorial.
- Realtime API - You can also listen to database changes over WebSockets with Supabase's Realtime server. We won't be using this in this tutorial.
Tables
A table is a collection of structured data that lives in the Postgres database. When using Supabase's authentication, when a user signs up, the user data is stored as a row in a users table. Each row has several columns, containing information such as email, creation date, etc. Note that the users table managed by Supabase is off-limits and cannot be accessed from the client. If we want to store additional user data, we'd need to create a new, separate table.
A table column has a type restriction: it can be a number, text, or something else. Once we create a table, this is not straight-foward to change, so we should think of our data model carefully first. But we can always add more columns later!
Each table has a column that is a primary key, a unique identifier which we can use to update or fetch specific rows from the table.
There are lots of useful resources on SQL, Postgres and relational databases out there if you're not familiar/comfortable with the concepts, but this tutorial should be easy to follow either way.
Data types
Postgres supports several data types, but we'll mostly be using integer and varchar/text. Once we create a table with columns of these data types, this schema is enforced and we cannot, for example, insert a string value in an integer column.
Another notable data type is Postgres' jsonb, which allows you to store JSON strings containing multiple fields of your data in a column. This is very flexible and useful if we're not sure how our data is going to look like in the beginning. You could start with a jsonb column and eventually move to something more structured. However, while it's more flexible, there's also no enforced schema on the data stored inside the column, so if you know what data you'll be storing in advance, it's recommended to just use multiple columns for each field.
One good use case of the jsonb data type would be if you're migrating from a non-relational database (e.g. Firebase) to Supabase. You could map all your documents to a row containing an ID (the primary key), and a jsonb column containing all the document data in JSON.
Part 2: Database
Creating our first database
The first table we'll be needing for this note app, is a notes table! For starters, our notes will have a title, optional content, and creation and modification timestamps. Since we're building a Flutter app, let's start with the Dart model first.
// models/note.dart
class Note {
  final int id;
  final String title;
  final String? content;
  final DateTime createTime;
  final DateTime modifyTime;

  Note(this.id, this.title, this.content, this.createTime, this.modifyTime);
}
We also need an id field so we can edit and delete notes.
Now that we have the model, let's create a table in Supabase. From the admin interface, select your project, and then the SQL editor tab. On the top left you should see a "New query" option. We can pass raw SQL queries in this editor and run them against our database. We'll do this for creating tables, and can also do this when having to quickly check out some data, or run some migrations.
Let's run the following query to create the notes table.
create table notes (
  id bigserial primary key,
  title text not null,
  content text,
  create_time timestamptz default now() not null,
  modify_time timestamptz default now() not null,
  user_id uuid references auth.users (id) default auth.uid() not null
);
Our first table is ready! In the Database tab, you can now see the notes table in the public schema.
The id field is a bigserial, which is a bigint that is generated automatically if left blank, and the values are incremented automatically. The timestamp fields default to the current time.
Every field is required except content, which is optional. The user_id field is not part of our model, but we need this on the database side as we'll need this field so we can return the correct data when fetching notes for a specific user.
The user_id column has a foreign key constraint and it references auth.users (id). This means each note created needs to have a user_id field that matches an id field in the users table in the auth schema in our database. If the user ID provided does not match an existing user, we won't be able to insert this note to our database.
The user_id value defaults to auth.uid(), which is a special function in Postgres, provided by Supabase, that returns the current user by extracting it from the JSON web token (discussed in the previous part about authentication).
The auth schema is used by Supabase for authentication. All tables we create for the notes app will be created in a separate public schema.
Note that we could omit the (id) in the SQL query above, as if there is no column specified as reference the primary key of that table is used, which in our case is id.
Fetching data
Now we want to fetch the notes of the currently signed in user to display in the app. We can do this directly from the Supabase client, which uses PostgREST behind the scenes.
Let's create a NotesService which will use the Supabase client to fetch the notes, and map them to our Note model.
Here is our updated Services inherited widget which will also now contain the NotesService so we can retrieve it from any widgets that need it.
class Services extends InheritedWidget {
  final AuthService authService;
  final NotesService notesService;

  Services._({
    required this.authService,
    required this.notesService,
    required Widget child,
  }) : super(child: child);

  factory Services({required Widget child}) {
    final client = SupabaseClient(supabaseUrl, supabaseKey);
    final authService = AuthService(client.auth);
    final notesService = NotesService(client);
    return Services._(
      authService: authService,
      notesService: notesService,
      child: child,
    );
  }

  @override
  bool updateShouldNotify(InheritedWidget oldWidget) {
    return false;
  }

  static Services of(BuildContext context) {
    return context.dependOnInheritedWidgetOfExactType<Services>()!;
  }
}
And here is the NotesService:
class NotesService {
  static const notes = 'notes';

  final SupabaseClient _client;

  NotesService(this._client);

  Future<List<Note>> getNotes() async {
    final response = await _client.from(notes).select().execute();
    if (response.error == null) {
      final results = response.data as List<dynamic>;
      return results.map((e) => toNote(e)).toList();
    }
    log('Error fetching notes: ${response.error!.message}');
    return [];
  }

  Note toNote(Map<String, dynamic> result) {
    return Note(
      result['id'],
      result['title'],
      result['content'],
      DateTime.parse(result['create_time']),
      DateTime.parse(result['modify_time']),
    );
  }
}
By using select(), we return all columns of the notes table in the results. Since we actually don't need the user_id field, we can select only the fields we actually need.
Future<List<Note>> getNotes() async {
  final response = await _client
      .from(notes)
      .select('id, title, content, create_time, modify_time')
      .execute();
  if (response.error == null) {
    final results = response.data as List<dynamic>;
    return results.map((e) => toNote(e)).toList();
  }
  log('Error fetching notes: ${response.error!.message}');
  return [];
}
This query selects all notes, for all users. It would make sense for our query to have a where clause with the condition that the user_id field of the note matches the one of the currently signed in user. However, this query is run from the client, NOT the server. Which means, potentially, one could accidentally (or not) fetch notes of other users. This is one of the drawbacks of not having a back-end server, as all the data is available to all users by default. This is a huge issue, but the solution is actually pretty simple. Enter Policies.
Policies
Policies are a a PostgreSQL feature that allows you to define row level security policies for tables. This means, that even with the ability to run any query for a table, no rows will be visible or updatable unless the policy allows it.
To understand this better, let's create a policy:
create policy "Users can only view their own notes"
on notes
for select
using (auth.uid() = user_id);
This is a SQL query, which you can run from Supabase's admin interface. Now let's dig into the query. We're creating a policy with a useful description, on the notes table. This policy is for select statements. The condition for this policy, is that auth.uid() is the same as the user_id field of a note. As mentioned before, auth.uid() always returns the currently signed in user's ID.
This means, that even if we no longer filter on the user ID to fetch the notes for a user, only the notes of the current user will be returned. It's basically an automatic where clause! That's quite powerful, since if you set up your policies right, you don't have to worry about accidentally exposing data to the wrong users, or users updating or deleting data that is not their own.
Now, we've restricted users from selecting other users' notes, but what about other commands? There is still insert, update, and delete. But we can also use all for a policy, which will apply it to all commands.
create policy "Users can only view and update their own notes"
on notes
for all
using (auth.uid() = user_id)
That should do it! With this policy, we no longer need the previous one, as it's already covered by all.
Displaying notes
Now that our getNotes() function returns all notes for the current user, let's update our NotesPage widget to display them.
Just for testing, if you're curious if this is working as intended, we can add a note manually through a SQL query. Feel free to skip this part though, since next up we'll add functionality to actually create new notes.
To create a note manually, let's get our user's ID from the database with the following query.
select id from auth.users;
And let's insert a note for this user.
insert into notes values (1, 'My note', 'Note content', now(), now(), '2cb4a80a-3c75-4d80-86b0-d76a094cf915')
You could also add a note without needing SQL through the table editor.
Here is the updated NotesPage widget:
class NotesPage extends StatefulWidget {
  const NotesPage();

  @override
  _NotesPageState createState() => _NotesPageState();
}

class _NotesPageState extends State<NotesPage> {
  Future<void> _signOut() async {
    final success = await Services.of(context).authService.signOut();
    if (success) {
      Navigator.pushReplacement(
          context, MaterialPageRoute(builder: (_) => HomePage()));
    } else {
      ScaffoldMessenger.of(context).showSnackBar(
          SnackBar(content: Text('There was an issue logging out.')));
    }
  }

  Future<void> _addNote() async {
    // TODO
  }

  @override
  Widget build(BuildContext context) {
    return Scaffold(
      appBar: AppBar(
        title: Text('Supanotes'),
        actions: [_logOutButton(context)],
      ),
      body: ListView(
        children: [
          FutureBuilder<List<Note>>(
            future: Services.of(context).notesService.getNotes(),
            builder: (context, snapshot) {
              final notes = (snapshot.data ?? [])
                ..sort((x, y) =>
                    y.modifyTime.difference(x.modifyTime).inMilliseconds);
              return Column(
                children: notes.map(_toNoteWidget).toList(),
              );
            },
          ),
        ],
      ),
      floatingActionButton: FloatingActionButton.extended(
        label: Text('Add note'),
        icon: Icon(Icons.add),
        onPressed: _addNote,
      ),
    );
  }

  Widget _logOutButton(BuildContext context) {
    return IconButton(
      onPressed: _signOut,
      icon: Icon(Icons.logout),
    );
  }

  Widget _toNoteWidget(Note note) {
    return ListTile(
      title: Text(note.title),
      subtitle: Text(note.content ?? ''),
    );
  }
}
We use a FutureBuilder to load the notes from the NotesService, and display the notes in a column. The notes are sorted by modify time (latest one first). We also changed the sign out button to be an action in the AppBar instead of a button in the page.
This was previously a stateless widget, but has been converted to a stateful widget for convenience; we will use setState after creating or changing notes to refresh the page.
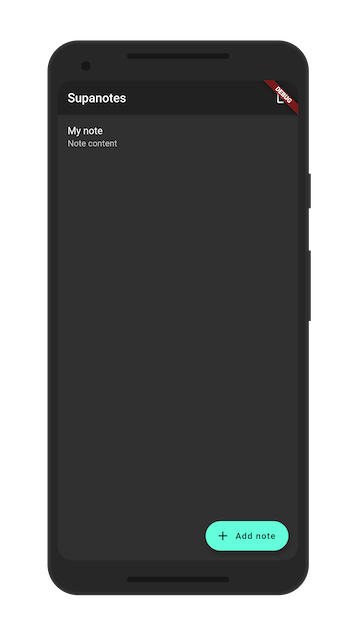
If your notes page looks like in the screenshot below, you did everything correctly! Next, we're going to implement the logic to add a new note, which will be done through the FAB button that currently doesn't do anything.
Creating notes
Now, let's create the NotePage, where we'll be able to create a new note.
class NotePage extends StatefulWidget {
  const NotePage();

  @override
  _NotePageState createState() => _NotePageState();
}

class _NotePageState extends State<NotePage> {
  final _titleController = TextEditingController();
  final _contentController = TextEditingController();

  Future<void> _saveNote_() async {
    if (_titleController.text.isEmpty) {
      _showSnackBar('Title cannot be empty.');
    }
    final note = await Services.of(context)
        .notesService
        .createNote(_titleController.text, _contentController.text);
    if (note != null) {
      Navigator.pop(context, note);
    } else {
      _showSnackBar('Something went wrong.');
    }
  }

  void _showSnackBar(String text) {
    ScaffoldMessenger.of(context).showSnackBar(SnackBar(content: Text(text)));
  }

  @override
  Widget build(BuildContext context) {
    return Scaffold(
      appBar: AppBar(
        title: Text('New note'),
      ),
      body: Column(
        children: <Widget>[
          Padding(
            padding: const EdgeInsets.all(8.0),
            child: TextField(
              controller: _titleController,
              decoration: InputDecoration(hintText: 'Title'),
            ),
          ),
          Padding(
            padding: const EdgeInsets.all(8.0),
            child: TextField(
              controller: _contentController,
              decoration: InputDecoration(hintText: 'Content'),
            ),
          ),
        ],
      ),
      floatingActionButton: FloatingActionButton.extended(
        onPressed: _saveNote,
        icon: Icon(Icons.save),
        label: Text('Save'),
      ),
    );
  }

  @override
  void dispose() {
    _titleController.dispose();
    _contentController.dispose();
    super.dispose();
  }
}
This page widget is simple. Two text fields, one for the title and one for the content. Pressing the FAB button saves the note to the database. When saving, we check that the title is not empty, and show a simple snackbar otherwise.
One thing to note is that since creating the note might take a while, we don't want the users to accidentally tab the "Add note" button twice and create duplicate notes. So we should introduce some mechanism to disable the button until we get the result from the notes service, but that's outside of the scope of this tutorial.
Here is the createNote function in NotesService:
// NotesService
Future<Note?> createNote(String title, String? content) async {
  final response = await _client
      .from(notes)
      .insert({'title': title, 'content': content}).execute();
  if (response.error == null) {
    final results = response.data as List<dynamic>;
    return toNote(results[0]);
  }
  log('Error creating note: ${response.error!.message}');
  return null;
}
Since most values are generated by default, with the exception of the title and content, all we need to pass to our insert query is these two fields. The response contains a list of all inserted records, which in our case is just the one note, which we return in this function, if there were no issues.
Now let's go back to the NotesPage and implement the _addNote_ function.
// NotesPage
Future<void> _addNote() async {
  final note = await Navigator.push<Note?>(
    context,
    MaterialPageRoute(builder: (context) => NotePage()),
  );
  if (note != null) {
    setState(() {});
  }
}
If a note is returned from the NotePage, we use setState to force the widget to reload, fetching all notes from the database again. We could optimize this part by maybe saving the notes in the widget's state, and rather than loading all notes from the database again, simply appending the new note. But let's keep it this way for simplicity!
Editing notes
In order to edit notes, let's change the NotePage a bit to support both creating and editing notes. We can pass an optional note to this widget, and if present, we can display its contents in the text fields, and call a function to edit the note rather than create a new one. Here's the updated constructor for NotePage widget:
class NotePage extends StatefulWidget {
  final Note? note;

  const NotePage({this.note});

  @override
  _NotePageState createState() => _NotePageState();
}
In the state widget, we override the initState method to populate the text fields with the note title and content if a note was passed in the constructor. The _saveNote function is updated to either create a new note, or update it. We also set the AppBar title accordingly.
// _NotePageState
@override
Widget build(BuildContext context) {
  return Scaffold(
    appBar: AppBar(
      title: Text(widget.note != null ? 'Edit note' : 'New note'),
    ),
    ...
  );
}

@override
void initState() {
  super.initState();
  if (widget.note != null) {
    _titleController.text = widget.note!.title;
    _contentController.text = widget.note!.content ?? '';
  }
}

Future<void> _saveNote() async {
  final title = _titleController.text;
  final content = _contentController.text;
  if (title.isEmpty) {
    _showSnackBar('Title cannot be empty.');
    return;
  }
  final note = await _createOrUpdateNote(title, content);
  if (note != null) {
    Navigator.pop(context, note);
  } else {
    _showSnackBar('Something went wrong.');
  }
}

Future<Note?> _createOrUpdateNote(String title, String content) {
  final notesService = Services.of(context).notesService;
  if (widget.note != null) {
    return notesService.updateNote(widget.note!.id, title, content);
  } else {
    return notesService.createNote(title, content);
  }
}
And here is the service function to update the note:
// NotesService
Future<Note?> updateNote(int id, String title, String? content) async {
  final response = await _client
      .from(notes)
      .update({'title': title, 'content': content, 'modify_time': 'now()'})
      .eq('id', id)
      .execute();
  if (response.error == null) {
    final results = response.data as List<dynamic>;
    return toNote(results[0]);
  }
  log('Error editing note: ${response.error!.message}');
  return null;
}
The above function updates the title, content, and modify time fields for the note with the above ID. Because of the policy we set up before, the update will only happen if the note with the given ID was created by the current user. Passing now() in the modify time field will set the current time.
Now, let's make it so that if you tap on any note, the edit page will show up:
// NotesPage
Future<void> _editNote(Note note) async {
  final updatedNote = await Navigator.push<Note?>(
    context,
    MaterialPageRoute(builder: (context) => NotePage(note: note)),
  );
  if (updatedNote != null) {
    setState(() {});
  }
}

Widget _toNoteWidget(Note note) {
  return ListTile(
    title: Text(note.title),
    subtitle: Text(note.content ?? ''),
    onTap: () => _editNote(note),
  );
}
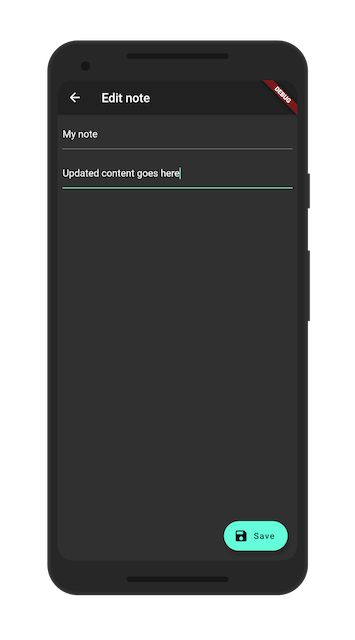
Very similarly to the creating notes implementation, if the NotePage is popped with a note, it means the note was updated, so we can rebuild the widget to display the changes.
When tapping on a note, you should now see this:
Deleting notes
So far, we can create new notes, and edit them. The next, and final step for this tutorial, is to delete them!
We'll wrap the note widgets in a Dismissible and call the delete function in the confirmDismiss function. If deletion is successful, we call setState on dismissal to rebuild the widget.
// NotesPage
Widget _toNoteWidget(Note note) {
  return Dismissible(
    key: ValueKey(note.id),
    direction: DismissDirection.endToStart,
    confirmDismiss: (_) =>
        Services.of(context).notesService.deleteNote(note.id),
    onDismissed: (_) => setState(() {}),
    background: Container(
      padding: const EdgeInsets.all(16.0),
      color: Theme.of(context).errorColor,
      alignment: Alignment.centerRight,
      child: Icon(Icons.delete),
    ),
    child: ListTile(
      title: Text(note.title),
      subtitle: Text(note.content ?? ''),
      onTap: () => _editNote(note),
    ),
  );
}
// NotesService
Future<bool> deleteNote(int id) async {
  final response = await _client.from(notes).delete().eq('id', id).execute();
  if (response.error == null) {
    return true;
  }
  log('Error deleting note: ${response.error!.message}');
  return false;
}
And that's it!
Wrapping up
In this part of the tutorial, we showed how to create a table in Supabase, and how to create, read, update and delete records from our Flutter app using the Supabase client. We also discussed policies, a powerful feature by Postgres that makes sure data from the database is secured and cannot be accessed by the wrong users through the Supabase client.
Next up, we'll dive into Supabase's Storage offering. We'll make use of this feature by implementing the functionality to attach files to notes. To do this, we will also introduce a simple one-to-many relationship between the notes table and a new attachments table.
If you'd like to be notified when the next part of this series is published, and for any future tutorials, please sign up with your email below.